Nittanya Auto
Learning how to install rear brake drums and shoes requires patience, correct measurements, and respect for braking safety. The job looks simple, but small mistakes can affect stopping distance, pedal feel, and drum wear. ChrisFix, a widely followed automotive repair educator, often stresses, “Safety is always the number one priority.” That principle belongs at the center of every brake repair.
This guide, “Top 10 Tips How to Install Rear Brake Drums and Shoes,” focuses on practical workshop details. You will learn how to identify the leading and trailing shoes, photograph spring locations, clean the backing plate, and inspect wheel cylinders for leaks. Keep the service manual nearby. Brake layouts vary between vehicles, even when the drums appear identical. Never guess the spring arrangement.
Use approved brake cleaner, eye protection, and a suitable dust mask. Avoid blowing brake dust into the air with compressed air. Support the vehicle securely, then check the drum’s inner diameter before reusing it. A worn drum can make new shoes fit poorly. Measure twice.
Small errors matter.
The guide also covers adjuster orientation, shoe-to-drum contact, parking-brake cable movement, and final pedal testing. Do not rush the first adjustment. I have seen experienced technicians overlook a reversed adjuster, especially on unfamiliar models. That is worth remembering. If the drum will not seat smoothly, stop and investigate. Do not force it with wheel nuts. After installation, perform low-speed tests in a safe area and verify stable braking before normal driving.
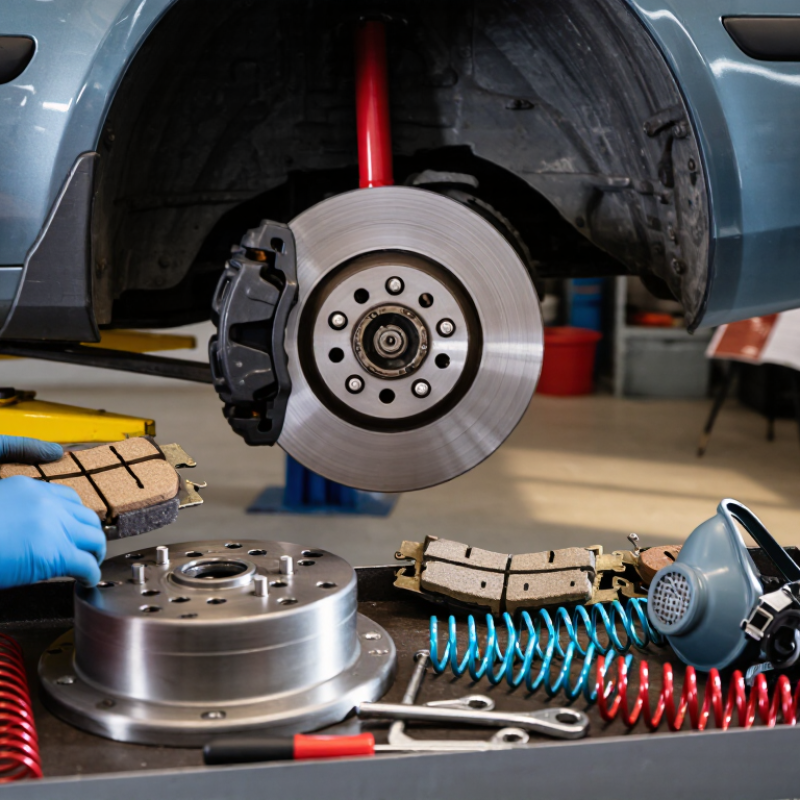
Top 10 Tips How to Install Rear Brake Drums and Shoes?
Safety Checks and Tools for Rear Brake Drum Installation
Rear brake drum work starts with a stable vehicle, not the brake parts. Park on level ground, block the front wheels, and support the rear axle with strong jack stands. Never rely on a hydraulic jack alone. Wear eye protection and gloves. Brake dust can irritate your lungs, so avoid compressed air. Use approved brake cleaner and a damp cloth instead.
Prepare a torque wrench, socket set, brake spring pliers, screwdrivers, a flashlight, and a small wire brush. Keep the service manual nearby because spring positions and adjustment methods vary. Photograph the old assembly before removing anything. That small step has saved me from guessing later. Inspect the drum, shoes, wheel cylinder, springs, adjuster, and backing plate for leaks, cracks, deep grooves, or heavy rust. Replace questionable hardware rather than forcing it back into service.
Clean the contact points carefully, but do not contaminate the friction surfaces with grease. Install the shoes and springs in their original positions, then adjust the shoes until the drum turns with slight, even resistance. I once adjusted too tightly and had to redo the work. That mistake was avoidable. Tighten fasteners to the specified torque, pump the brake pedal gently, and check the parking brake. Before normal driving, test braking at low speed in a clear area. Recheck for pulling, scraping, or unusual pedal travel.
Removing an old brake drum requires patience and a stable work area. Park on level ground, secure the front wheels, and support the vehicle with rated jack stands. Never rely on a jack alone. Before touching the assembly, take clear photos from several angles. Drum brake springs often look confusing after removal.
If the drum will not slide off, release the adjuster through its access opening. Rust can create a sharp lip inside the drum, so avoid forcing it with excessive hammering. Tap around the outer edge with a suitable mallet instead. Keep brake dust controlled with approved brake cleaner and a collection method. Do not blow dust into the air with compressed air. It may contain harmful particles.
Remove the return springs with a proper spring tool, not a screwdriver. Springs can fly across the work area. Take off the hold-down pins, cups, adjuster, and shoes in a controlled order. Lay each part on the floor in its original position, or photograph it again. I have seen one small spring installed backward, causing poor shoe movement. It is an easy mistake. Inspect the backing plate for deep grooves, the wheel cylinder for leaks, and the drum surface for cracks or heavy scoring. Replace damaged hardware rather than stretching old springs. Check the service manual for the correct spring layout and adjustment direction before reassembly.
Typical estimated time per wheel for removing the old drum, shoes, springs, and hardware, followed by installation and adjustment.
Planning estimates are based on a standard rear drum-brake service. Actual time varies with corrosion, access, and vehicle-specific hardware.
Before installing rear brake drums and shoes, park the vehicle on level ground. Support it securely with stands, then remove the wheel and drum. Never trust a jack alone. Brake dust may contain harmful fibers and fine particles. Do not blow it into the air with compressed air. Use a suitable brake cleaner, a catch pan, and protective gloves.
Inspect the entire brake assembly before cleaning everything away. Look for cracked linings, uneven wear, loose rivets, and heat-darkened surfaces. Check the return springs for stretching or corrosion. Examine the wheel cylinder for dampness around its seals. Any fluid near the shoes requires attention before installation. Measure the drum’s inside diameter with a proper gauge, not a ruler. Compare the reading with the vehicle’s service limit. I once overlooked a shallow groove because the drum looked acceptable. That mistake could cause poor shoe contact.
Clean the backing plate, drum, and surrounding hardware carefully. Wipe the shoe contact pads until rust flakes and dirt are gone. Use a wire brush gently; aggressive scraping can damage smooth surfaces. Keep cleaner away from new friction material. Even a small oil mark can reduce braking performance. Inspect the parking-brake lever and adjuster for free movement. Replace questionable springs or damaged hardware instead of reusing them. Before fitting the shoes, confirm that every contact point is dry and lightly treated only where specified by the service procedure. Small details matter.
Top 10 Tips: How to Install Rear Brake Drums and Shoes?
Installing New Shoes, Springs, and Adjuster Components
Park on level ground and secure the front wheels before lifting the rear axle. Support the vehicle with rated stands, not the jack alone. Remove one drum and photograph the complete assembly. That reference matters because leading and trailing shoes may look nearly identical. Clean the backing plate with brake cleaner and a damp cloth. Do not blow brake dust into the air. Inspect the wheel cylinder, shoe contact pads, and parking-brake lever for leaks or damage.
Tip: Replace springs as a matched set. Old springs can lose tension and cause uneven braking. Install the shoes in their original positions, then connect the parking-brake cable. Fit the upper and lower springs with a proper brake-spring tool. Pliers can slip. They can also bend the spring hooks. Apply a very small amount of high-temperature brake lubricant to the backing-plate contact points, keeping grease away from the friction linings.
Tip: Check the adjuster direction carefully. Its threaded wheel should expand when the drum rotates in the normal direction. Clean the threads, apply a light lubricant, and set the adjuster nearly closed. The drum should slide over the shoes with slight resistance. I still recheck this step because one reversed adjuster can create confusing symptoms. After installation, pump the brake pedal until it feels firm, then adjust each drum through the access slot. The parking brake should hold without excessive travel. Perform a slow test in a safe area and inspect for dragging, noise, or pulling.
After installing the rear brake drums and shoes, adjust the shoes before driving. Turn the star-wheel adjuster until the drum slides over the shoes with slight resistance. The drum should rotate by hand, but it should not spin freely for several seconds. Too much clearance creates a low pedal and weak parking brake. Excessive adjustment causes heat and premature wear. I once adjusted a drum too tightly, and the wheel became noticeably hot after a short road test. That mistake was easy to miss.
Pump the brake pedal slowly until it feels firm, then apply and release the parking brake several times. Recheck wheel movement and adjust both sides evenly. The parking brake should hold securely without requiring extreme lever travel. Tighten the wheel nuts and other fasteners to the vehicle manufacturer’s specified torque. Never rely on feel alone. Before public-road testing, inspect for leaks, damaged springs, loose hardware, or abnormal shoe contact.
Begin bedding-in on a quiet, dry road. Make several gentle stops from moderate speed, allowing the brakes to cool briefly between applications. Avoid holding the pedal while stationary, because hot shoe material can transfer unevenly onto the drum. Listen for scraping, pulling, vibration, or a burning smell. Stop immediately if any warning appears. Drum brakes can feel acceptable while still needing correction, so recheck their adjustment after the first drive. My own inspection routine has improved over time; skipping the cool-down period was not a habit worth keeping.
Park on level ground, block the front wheels, and support the rear axle with rated jack stands. A hydraulic jack alone is not enough. Wear gloves and eye protection.
Gather a torque wrench, sockets, brake spring pliers, screwdrivers, a flashlight, and a small wire brush. Keep the service manual nearby; spring layouts and adjustment methods can vary.
Photos show where each spring and shoe belongs. Take them from several angles. I once relied on memory and had to rethink one spring’s position.
Release the adjuster through its access opening. Rust may leave a sharp inner lip, so avoid forceful hammering. Gentle taps around the edge may help.
Use approved brake cleaner and a damp cloth. Do not use compressed air, which can spread dust into the air.
Check the drum for cracks or deep scoring. Look for wheel-cylinder leaks, backing-plate grooves, rusty parts, and worn springs. Replace questionable hardware.
Match the original positions and check your photos and service manual. Use proper spring pliers; springs can fly loose. Small details matter.
Adjust the shoes until the drum turns with slight, even resistance. Tighten fasteners to the specified torque, gently pump the brake pedal, and check the parking brake. Then test at low speed in a clear area and watch for pulling, scraping, or unusual pedal travel.
Learning how to install rear brake drums and shoes safely begins with proper preparation. Park the vehicle on a level surface, secure it with wheel chocks and approved stands, and gather the correct hand tools, protective equipment, replacement shoes, springs, adjusters, and drums. Remove the old drum and carefully document the arrangement of the shoes, springs, clips, and hardware before taking them apart. Avoid inhaling brake dust, and clean the assembly with an appropriate brake cleaner rather than compressed air. Inspect the backing plate, wheel cylinder, contact points, and parking brake mechanism for wear, leaks, or damage before continuing.
Install the new shoes and hardware in their correct positions, making sure every spring and adjuster is seated securely. Refit the drum, adjust the shoes until there is slight, even resistance, and reinstall the wheel. Test the brake pedal, check for unusual noises or pulling, and confirm the parking brake operates correctly. Perform a cautious bedding-in process in a safe area, allowing the new components to develop consistent contact before normal driving.
