Nittanya Auto
Why Should You Replace Old Brake Pads With New Rotors?
Can you use old brake pads with new rotors? Sometimes, but it is rarely the best choice. New rotors have a fresh, even braking surface. Old pads may be worn unevenly, glazed, or shaped to match grooves in the previous rotors. Set them against a new rotor, and their contact may be patchy. That can mean noise, vibration, longer bedding-in, or reduced braking performance.
Eric Cook, the automotive technician known as EricTheCarGuy, offers a useful repair principle: “The parts that contact each other need to work together.” This is a practical paraphrase, not a verified verbatim quotation. It captures why a mechanic should inspect both parts rather than judge pads by thickness alone. Look for cracks, hard shiny patches, uneven wear, and contamination. A pad can have material left and still be unsuitable for reuse.
Replacing pads and rotors together helps create a consistent friction surface and gives the new components a better chance to bed in evenly. Still, replacement is not automatic in every case. The vehicle maker’s service guidance, rotor condition, pad design, and a qualified inspection all matter. Brakes are not a place for guesswork. If you are unsure, ask a technician to measure the pads and rotors and explain the findings before driving.
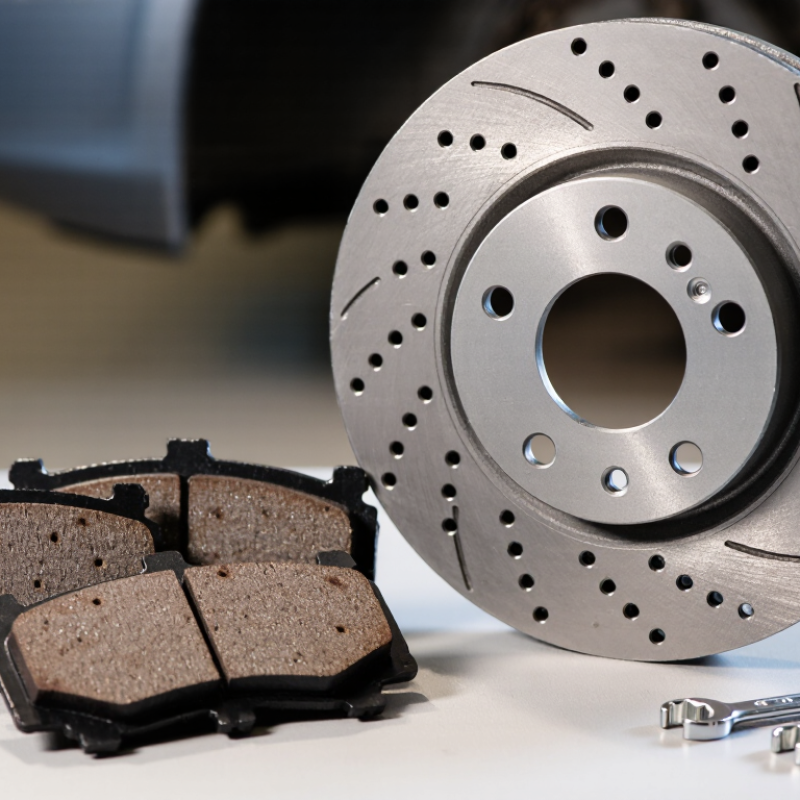
Why Should You Replace Old Brake Pads With New Rotors?
A worn pad does not contact the rotor evenly. Its friction material can leave grooves, heat spots, or a tapered wear pattern. I once treated a smooth-looking rotor as reusable. That shortcut was incomplete. A micrometer check later showed thickness variation beyond the service limit.
SAE J431 is central to this decision. It classifies automotive gray iron by mechanical properties, including minimum tensile strength. For example, G2500 gray iron requires about 25,000 psi tensile strength. The standard supports material quality, but it does not approve every used rotor for reuse. Rotor inspection still requires thickness, parallelism, surface condition, and crack checks. Those details matter more than appearance.
Rotor thickness must remain above the vehicle maker’s discard specification. The rotor also needs enough mass to absorb repeated heat cycles. NHTSA’s FMVSS No. 135 requires light vehicles to stop within 65.8 meters from 100 km/h under specified test conditions. Real roads add hills, water, cargo, and repeated braking. Old pads may also carry embedded debris. New pads against damaged iron can produce noise, vibration, and uneven bedding. Sometimes, replacement is the safer measurement-based choice. a visual check is not enough.
Old brake pads do not automatically require new rotors. Inspect both parts before deciding. Measure each pad at its thinnest point, including inner pads, which can wear faster when calipers stick. Compare the reading with the vehicle maker’s service limit; uneven thickness, cracking, or contamination also signals trouble. Check rotor thickness against its stamped minimum or service manual, not a universal rule. Look for deep grooves, heat spots, rust at the braking surface, and visible cracks. A shiny rotor can still be too thin.
The Commercial Vehicle Safety Alliance’s 2023 International Roadcheck reported that 19.3% of inspected commercial vehicles were placed out of service. Brake-system defects made up 25.4% of vehicle out-of-service violations. These figures concern commercial vehicles, not passenger cars, but they show why hands-on brake inspection matters. If pads are worn while rotors remain within specification and have a smooth, even face, resurfacing or reuse may be appropriate. If a rotor is below minimum thickness, cracked, or badly scored, replace it. I’d still recheck runout after installation; that step is easy to overlook.
Tips: Measure both sides of each rotor with a micrometer, away from the outer lip. Record pad thickness by wheel, and investigate uneven wear before fitting new parts. Follow the service manual’s bedding procedure after repairs. A short test drive helps catch noise or vibration, but it does not replace inspection.
Why Should You Replace Old Brake Pads With New Rotors?
New rotors give fresh brake pads a smooth, even surface to grip. But appearance alone cannot show whether a rotor is safe to reuse. Measure its thickness with a brake micrometer, not a ruler, and compare the reading with the vehicle manufacturer’s minimum-limit specification. That figure may be stamped on the rotor hat or listed in service information. A rotor can look thick and still fall below its limit. Don’t guess.
Measure at several points around the rotor, away from the outer rust ridge. Uneven readings can point to wear or variation that affects braking. If any reading is at or below the discard limit, replace the rotor; resurfacing is not a safe workaround. Also check for deep grooves, cracks, or heat spots. New pads on a worn rotor may bed in poorly, causing noise, vibration, or uneven contact. I’ve seen clean-looking rotors fail a thickness check. It’s easy to miss.
Tips: Use a calibrated micrometer and record each measurement. Check whether the service specification refers to minimum thickness after machining or the final discard limit; they are not always interchangeable. Replace rotors in axle pairs when required by the service procedure, and follow the specified bedding process. If readings vary or the specification is unclear, pause and consult a qualified technician. When in doubt, recheck.
Compare the measured brake-rotor thickness with the manufacturer’s minimum-limit specification. Rotors at or below the minimum limit should be replaced because reduced thickness can affect heat control, braking performance, and resistance to distortion. New brake pads should be installed with rotors that meet the required thickness specification.
Why Should You Replace Old Brake Pads With New Rotors?
Why Pairing New Rotors With New Pads Supports Proper Bedding-In
Old brake pads often develop an uneven friction surface. They may also carry grooves, glazing, or an aged transfer layer. Installing them on new rotors can create inconsistent contact. New pads and rotors are designed to establish a fresh, even mating surface during bedding-in. This process gradually transfers a controlled layer of pad material onto the rotor. It also helps stabilize friction and pedal response.
Bedding-in needs controlled heat, not aggressive braking. On a safe road, apply the brakes firmly from moderate speed, then release them fully. Repeat several times while allowing brief cooling periods. Avoid panic stops during the early miles. Do not keep your foot pressed on the pedal after a hard stop. Heat can concentrate beneath the pad and leave uneven deposits. The process feels less dramatic than many drivers expect. That does not make it unimportant. One mistake is rushing it.
Tips: Follow the vehicle’s service instructions. Check that the caliper moves freely and the rotor runs true. Keep braking pressure smooth. If you notice vibration, pulling, burning smells, or unusual noise, stop testing and arrange a professional inspection. Bedding-in cannot correct damaged hardware or poor installation.
| Comparison Dimension | Old Rotors With New Pads | New Rotors With New Pads | Why It Matters During Bedding-In | Practical Consideration |
|---|---|---|---|---|
| Friction-Surface Condition | May contain grooves, ridges, scoring, corrosion, or uneven wear from the previous pads. | Provides a clean, consistent surface designed to work with the replacement pads. | A uniform contact surface helps the pad and rotor develop an even friction relationship. | Inspect the rotor surface and measure thickness before deciding whether it can be reused. |
| Pad-to-Rotor Contact | New pads may initially contact only the high spots of a worn rotor. | New pads can progressively make contact across the intended braking area. | More even contact supports a controlled transfer of pad material during burnishing. | A short break-in period is still required; full contact is not immediate. |
| Bedding-In Consistency | Uneven rotor wear can make the bedding process irregular and lengthen the time needed for stable braking performance. | The matched new surfaces provide a more predictable foundation for bedding-in. | Consistent friction helps the pad material transfer evenly rather than forming localized deposits. | Follow the vehicle or pad manufacturer’s bedding procedure whenever one is specified. |
| Brake Judder Risk | Existing thickness variation, lateral runout, or uneven deposits may remain and can contribute to pedal or steering vibration. | Correctly installed new rotors reduce the chance of carrying over these existing surface problems. | Even surfaces help reduce uneven braking forces as the parts mate. | Rotor replacement does not correct a sticking caliper, damaged hub, or installation error. |
| Heat Distribution | Wear, corrosion, or reduced thickness may affect how the rotor absorbs and releases heat. | A rotor within the correct specification provides the intended thermal mass and heat-dissipation characteristics. | Controlled heat cycles are important for establishing a stable friction layer without overheating the new pads. | Avoid repeated hard stops or holding the pedal firmly after a high-temperature stop during break-in. |
| Minimum Thickness | May already be near or below the service limit, leaving less material for safe wear and heat management. | Starts at the specified new thickness for the vehicle application. | Proper thickness supports the rotor’s ability to tolerate normal braking heat during bedding. | Compare measured thickness with the vehicle manufacturer’s minimum discard thickness. |
| Corrosion and Surface Deposits | Rust scale or old pad deposits may interfere with smooth, even contact. | New friction surfaces are generally free from the previous pad’s deposits, although protective coatings may require removal where applicable. | Reducing surface contamination helps the pad establish a more uniform transfer layer. | Clean the rotor according to the component instructions and remove shipping residue before installation. |
| Noise Potential | Grooves, edges, deposits, or mismatched wear patterns can increase the possibility of squeal or other noise. | Correctly matched and properly installed components provide a more stable contact relationship. | Even bedding can reduce friction changes that sometimes contribute to noise. | Noise can also result from hardware, lubrication, caliper movement, contamination, or pad material. |
| Installation Compatibility | New pads may not match the worn rotor’s profile, especially when the old rotor has a pronounced lip or deep grooves. | New pads and rotors begin with compatible, unworn mating surfaces. | Matching new surfaces makes the initial burnishing process more predictable. | Use components with the correct dimensions, friction material, and application specification. |
| Long-Term Wear Pattern | Uneven contact may cause the new pads to wear irregularly or leave unused areas of friction material. | Properly installed new pads and rotors are more likely to wear evenly together. | Even wear helps preserve consistent braking performance throughout the service interval. | Check caliper pins, piston movement, abutment surfaces, and wheel installation torque. |
| Recommended Bedding Approach | Results can be unpredictable when the old rotor condition is unknown or outside specification. | Perform a series of moderate stops from a safe speed, allowing appropriate cooling between stops, without locking the wheels or keeping the pedal applied after a hot stop. | Progressive heat cycles help the pad and rotor establish a stable contact and transfer layer. | Use a safe, legal road and stop the procedure if abnormal vibration, noise, smoke, or loss of braking occurs. |
| Important: Replace rotors when they are below the specified minimum thickness, excessively scored, cracked, severely corroded, warped beyond specification, or otherwise damaged. Brake work should be performed using the vehicle manufacturer’s procedures and appropriate safety checks. | ||||
Replacing worn brake pads with new rotors is only half the repair. The system must still deliver predictable stopping performance after installation. Old pads can carry uneven wear, glazing, or embedded debris. They may also create poor contact with a fresh rotor. New pads and rotors should be installed as a matched friction pair, with caliper movement, hardware, and fluid condition checked carefully.
FMVSS No. 135 provides a useful performance reference for light-vehicle braking systems. It addresses service braking, parking-brake performance, fade and recovery, and braking after water exposure. A qualified technician can use its principles during verification, although formal compliance requires controlled testing.
The road test should begin in a safe area. Check for a firm pedal, straight tracking, smooth engagement, and no unusual vibration or noise. Perform several moderate stops, allowing time for cooling between them. Do not make one aggressive stop and call the job complete.
Proper bedding matters. Friction surfaces need gradual heat cycles to develop consistent contact. Afterward, compare pedal response and stopping behavior before and after the test. Check for fluid leaks and confirm that warning lights remain off. Temperature differences between wheels can reveal dragging. Small imperfections are easy to dismiss, but they may signal a seized slide pin or uneven pad contact. Recheck wheel fasteners with the specified torque, then inspect the brakes again after the first drive. Careful verification is less dramatic than installation, but it is where confidence is earned.
Worn pads can have grooves, glazing, or embedded debris. They may contact a fresh rotor unevenly and cause noise, vibration, or irregular bedding.
No. Appearance alone cannot show thickness variation or hidden damage. Measure thickness and check parallelism, surface condition, and cracks.
It classifies gray iron by mechanical properties, including minimum tensile strength. It does not determine whether a used rotor is safe to reuse.
Compare its measured thickness with the vehicle maker’s discard specification. A rotor also needs enough mass to handle repeated heat cycles.
New friction surfaces can make more even contact. Old pads may carry uneven wear or debris, so the pairing can lead to poor braking feel.
Check pedal firmness, straight tracking, smooth engagement, unusual noise, and vibration. Inspect fluid for leaks and confirm warning lights stay off.
Start in a safe area and make several moderate stops. Allow cooling between stops; one hard stop is not enough.
One wheel running hotter may point to a dragging brake. A sticking slide pin or uneven pad contact could be the cause.
Torque wheel fasteners to the specified setting, then inspect the brakes again after driving. Small issues can be easy to dismiss.
Replacing old brake pads with new rotors requires more than simply fitting the parts together. Pad wear and rotor condition directly affect braking performance, contact consistency, and bedding-in. The SAE J431 disc-brake standard provides useful guidance for evaluating rotor material and condition, but technicians should also inspect pad thickness, uneven wear, scoring, cracks, heat damage, and rotor surface irregularities before deciding which components need replacement. Rotor thickness must be measured and compared with the vehicle manufacturer’s minimum-limit specification; a rotor below that limit should not remain in service.
Many drivers ask, “can you use old brake pads with new rotors?” Although it may be possible when the pads are thick and evenly worn, pairing new rotors with new pads is generally the better practice. Fresh friction surfaces promote more uniform bedding-in and reduce the risk of noise, vibration, or uneven contact caused by pads shaped to an old rotor. After installation, complete the recommended bedding procedure and verify pedal feel, stopping performance, and stability against the applicable FMVSS No. 135 criteria.
